Last updated 9 October 2020: customTask updated to a more stable version.
The Custom HTML tag in Google Tag Manager is splendid. It’s your go-to tool when you need to run arbitrary JavaScript on the webpage. Some might even use it to actually add HTML elements to the page, but I’m willing to bet running JavaScript is its most common use.
However, there’s a downside to Custom HTML tags, which is only made more apparent on single-page apps which do not clear the full page when transitioning from one state to another.
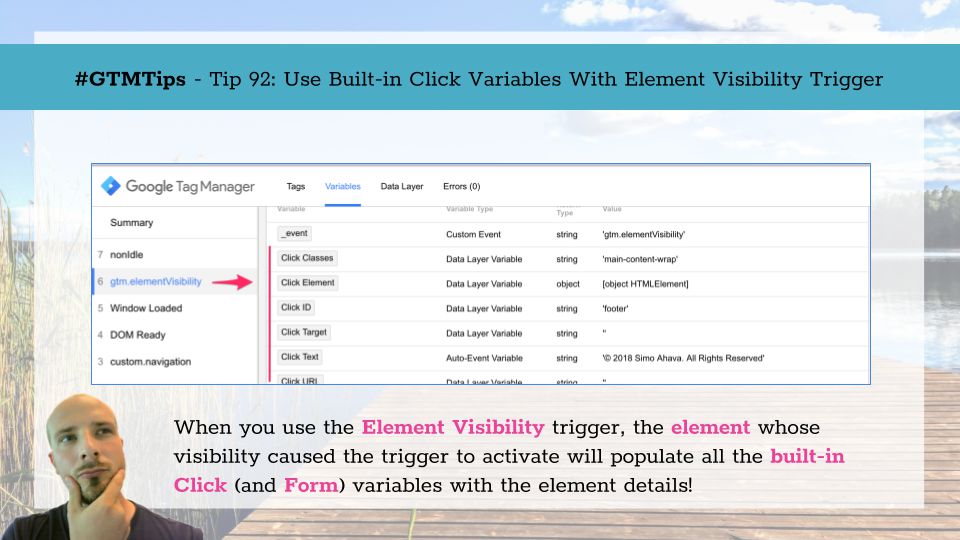
If you are enjoying the Element Visibility trigger as much as I am, you’ll be glad to know of a very simple tip that might make your life easier when using Google Tag Manager.
The tip is this: If you’ve activated the built-in Click variables, they will be automatically populated with details about the element that caused the Element Visibility trigger to activate!
Tip 92: Use Built-in variables to analyze the visible element Yes, it’s confusing they’re still named Click variables, especially since they’re duplicated in the Form variables, and even more so since they can be used with the Element Visibility trigger to identify which element became visibility.
One of the difficulties of working with Google Tag Manager and the dataLayer structure is that GTM doesn’t preserve history of the items collected into its data model. Or, at least, it doesn’t preserve it in a manner that would let us access it.
This is typically a very niche problem, but it does surface every now and then. For example, say you wanted to query whether an event with some specific value has already been pushed into dataLayer.
While using the Google Tag Manager user interface around Halloween 2018, you might have noticed a new tab in Google Tag Manager’s Preview mode. The tab is named Errors and shows you the number of exceptions thrown by GTM’s tag templates on the page. In this short #GTMTips post, I’ll quickly walk you through what the tab shows.
Tip 90: The Errors Tab In Preview Mode The tab’s name is an apt description of what the tab shows.
Google Tag Manager offers us some nice built-in triggers so that we can automatically listen for specific user interactions on the website, reacting to them however we wish, though typically it would be to fire a tag. The tricky thing especially with the click triggers and form submission tracking is that the page has a nasty habit of redirecting you to the link or form target page before letting you see the respective data in Google Tag Manager’s excellent preview mode.
A very recent addition to Google Tag Manager is the Format Value option in all of GTM’s variables. With Format Value, you can modify the output of the variable with a number of pre-defined transformations.
This is extremely handy, because you no longer need to create Custom JavaScript variables whose sole purpose of existence it to change the output of other variables to lowercase, or to change undefined values to fallback strings (e.
One of the coolest features of Google Analytics and, as a consequence, Google Tag Manager is customTask. It’s a method you can use to add and execute code as the hit to Google Analytics is being generated.
I’ve written A LOT about customTask, and much of the feedback I’ve received has been around the question of how to combine all these different tricks into one customTask script. The problem is, you see, that a tag or hit can only have one customTask script attached to it, so the code within must combine all the different tricks I’ve been writing about over the past months.