Be honest, can you think of anything that’s more unfair than this:
A new Google Tag Manager feature, published at 02:07 AM my time, and with an easter egg hunt involved?! Of course it was the infuriating Charles Farina who found the new feature and claimed the prize. Curses! (Just kidding Charles, you’re still awesome.)
Anyway, there’s a new GTM feature in town, and oh boy, this time it’s a big’un!
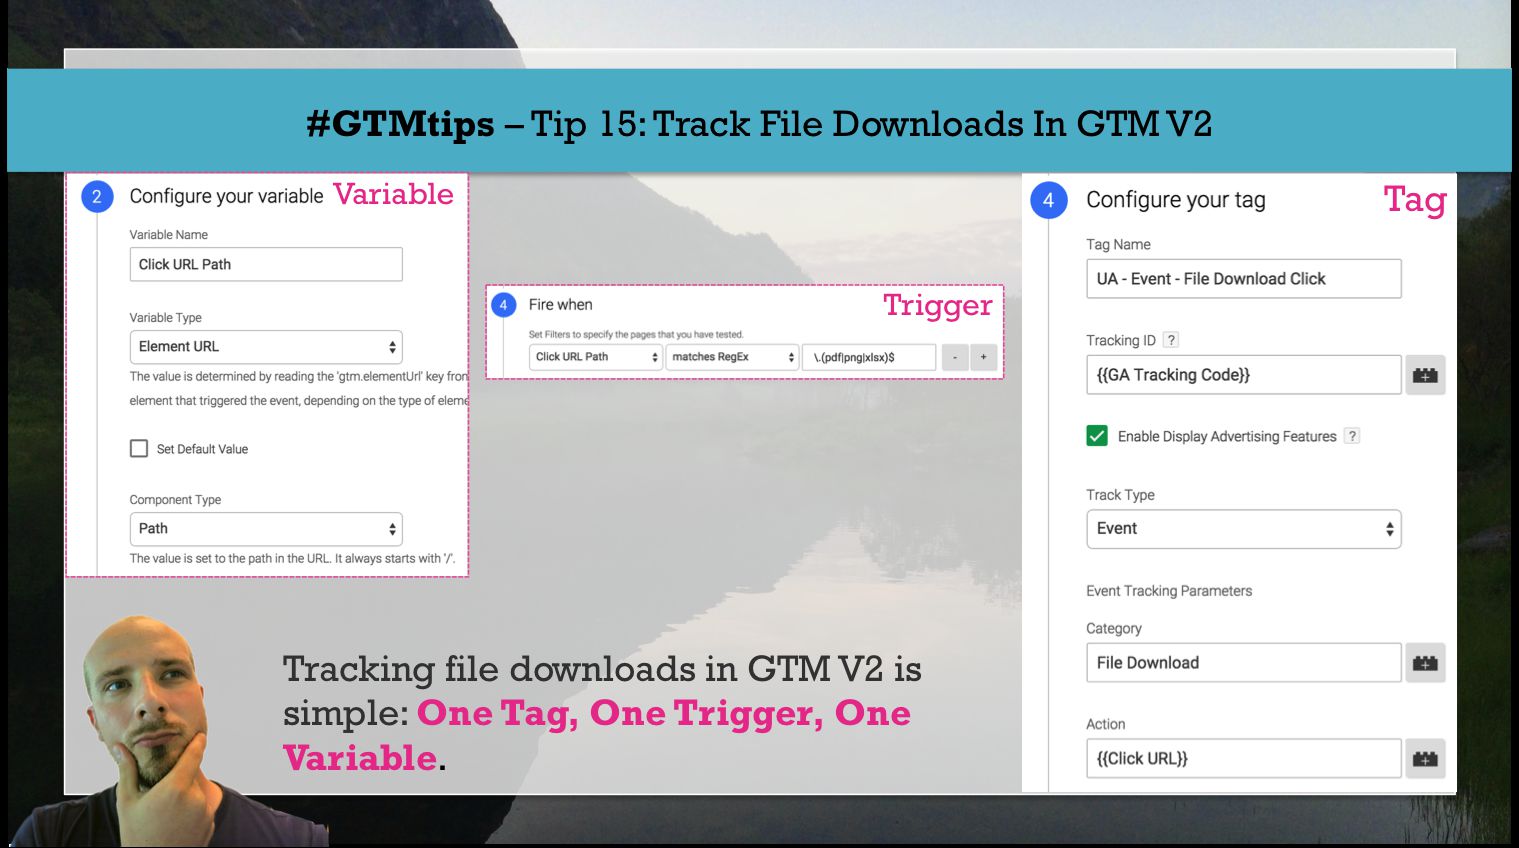
In this #GTMtips post, we’ll go over a simple method for tracking file downloads in Google Tag Manager, specifically the new, V2 interface. Also, “tracking file downloads” means sending Events to Google Analytics, so this is a GA for GTM guide as well.
Tip 15: Set up file download tracking in GTM Since we’re using Google Analytics as the tracking platform, we’ll need the following ingredients to make this setup work:
NOTE 30 Oct 2019: I’ve published a new article on outbound link tracking in Google Tag Manager, which makes the whole process much, MUCH simpler. I strongly recommend you read that article instead.
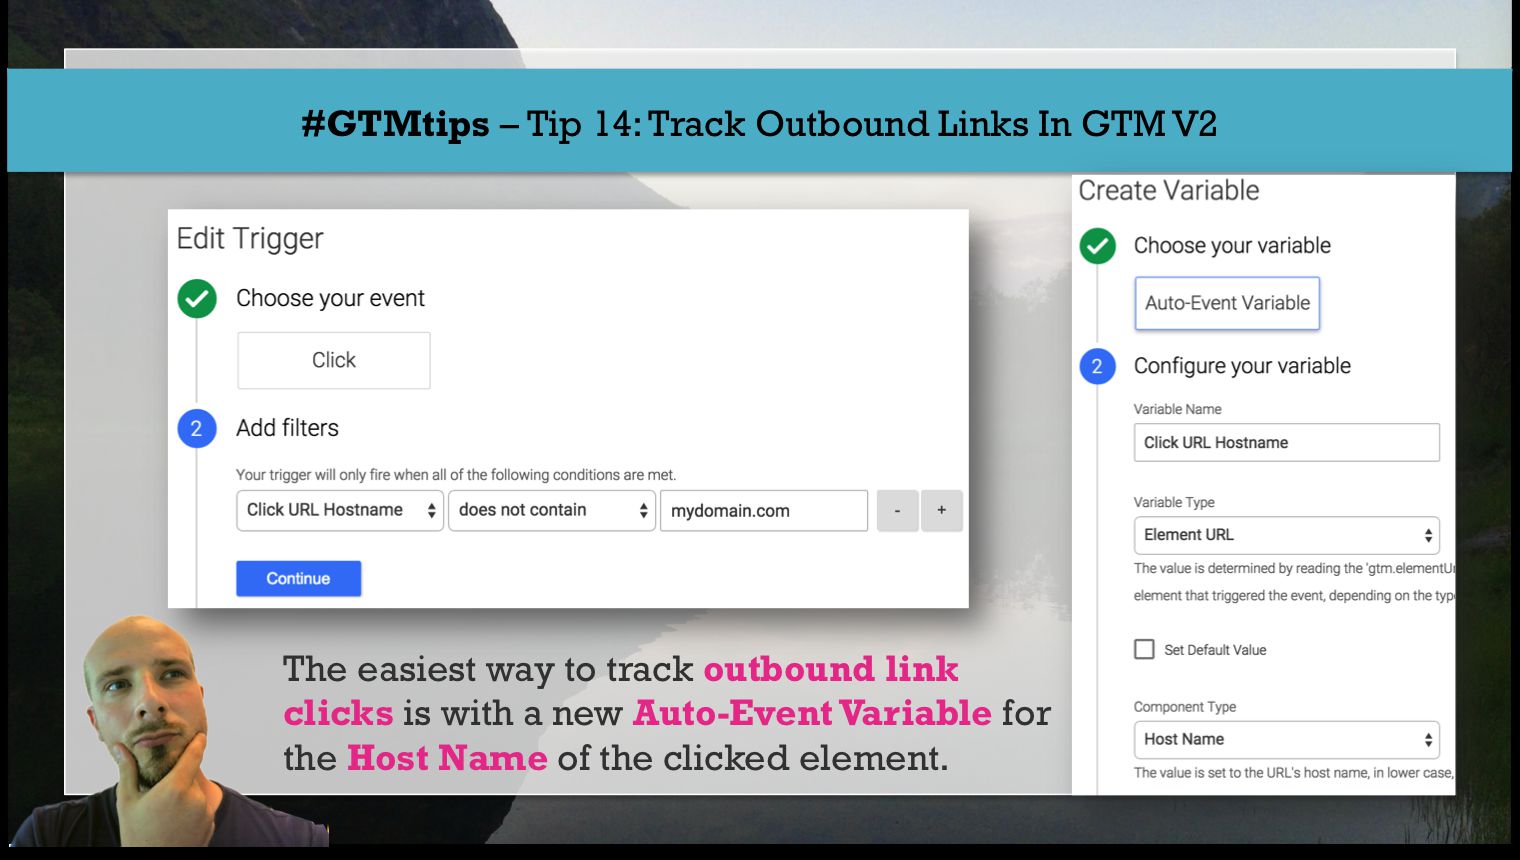
Tracking outbound links is important for many. Identifying the exit paths is almost as important as tracking entrances. In this simple #GTMtips post, I’ll show you how to track outbound links with a simple Trigger + Auto-Event Variable combination in the new Google Tag Manager interface.
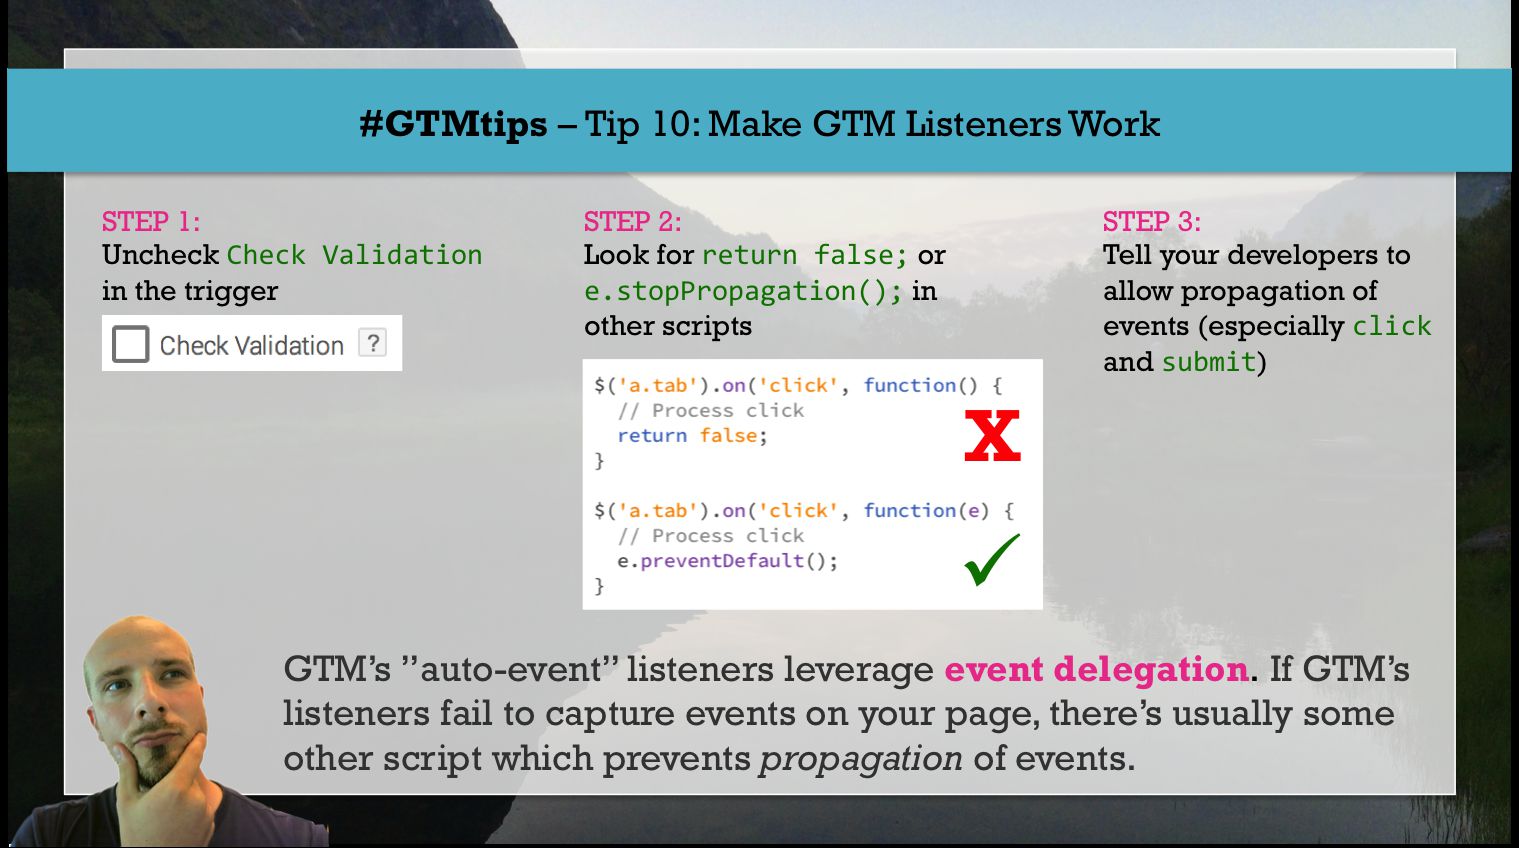
I’ve written about this before here and here, but this issue remains probably the biggest problem users have when implementing Google Tag Manager.
Tip 10: Resolve conflicts with GTM’s listeners The tip title is actually wrong. You’re not fixing Google Tag Manager listeners. Rather, you’re resolving conflicts that other scripts on your page might introduce.
GTM’s event listening is based on something called event delegation. Event delegation makes use of the document object model (DOM) and its tree-like hierarchy.
In the new version of Google Tag Manager, auto-event tracking has received a considerable usability upgrade. It might seem quirky at first, especially if you’re used to the old auto-event tracking method, but the logic behind the new setup is brilliant.
The most important distinction is that auto-event tracking isn’t something you control with separate tags anymore. Rather, it’s now entirely trigger-driven, meaning you activate and specify the auto-event tracking of your choice using tag triggers (triggers are what ye olde folk used to call rules).
There’s a much easier, native-to-GTM way to do this now: the Matches CSS Selector.
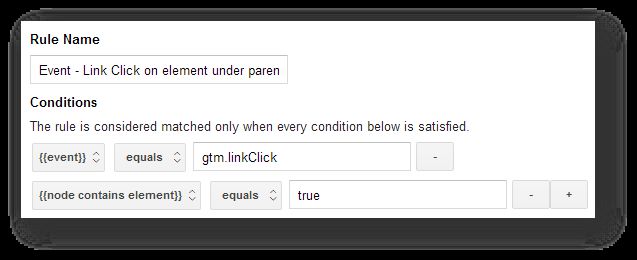
Behind this tragically boring title is a simple solution to many problems with Google Tag Manager’s auto-event tracking. The common denominator to these problems is poor website markup. Selectors are used sparingly, and element hierarchy is messy. This disregard for proper node relationships means you have to resort to Data Layer Variable Macros which look like
There is a new version of this post for GTM V2 here.
The Google Analytics Summit came and went, and thanks to the Live Stream, everyone could participate. We were treated to a rapid-fire selection of Google Analytics’ new features, and this post sheds light on one of these in particular: automated event tracking in Google Tag Manager.
Auto-event tracking introduces a nice feature, which does what tag managers ought to do: it provides functionality without HTML template editing.